Small Space, Real Order: 7 Home Organization Ideas That Reclaim 30% More Usable Storage
Small spaces rarely fail because they lack storage. They fail because the available storage is difficult to see, reach, or maintain.
A deep shelf becomes a forgotten shelf. A drawer becomes a crowded pile. The space behind a door goes unused. Items have no clear “home,” so they migrate to counters, chairs, and floors.
Use the right systems, and you can set a practical goal of reclaiming about 30% more usable storage in selected zones. You may also cut 15–20 minutes of searching and reshuffling per week by making everyday items visible and easier to return.
This guide focuses on specific products, measurements, and home product demonstrations. It does not repeat a daily reset routine. Instead, it helps you solve the storage problem at its source.
Start With Measurements, Not Shopping
Before browsing Amazon finds, measure the space you want to improve.
Record:
- Width: side to side
- Depth: front to back
- Height: from shelf to shelf, floor to ceiling, or floor to bed frame
- Clearance: the space needed for a door, drawer, or walkway to open
- Weight capacity: especially for racks, carts, and shelves
Leave approximately ½ to 1 inch of clearance around bins and carts whenever possible. That small margin helps containers slide smoothly and prevents doors from catching.
Take photos of each zone before you begin. Use the same camera angle for the after photo. You will need that comparison for both personal accountability and future shoppable videos.

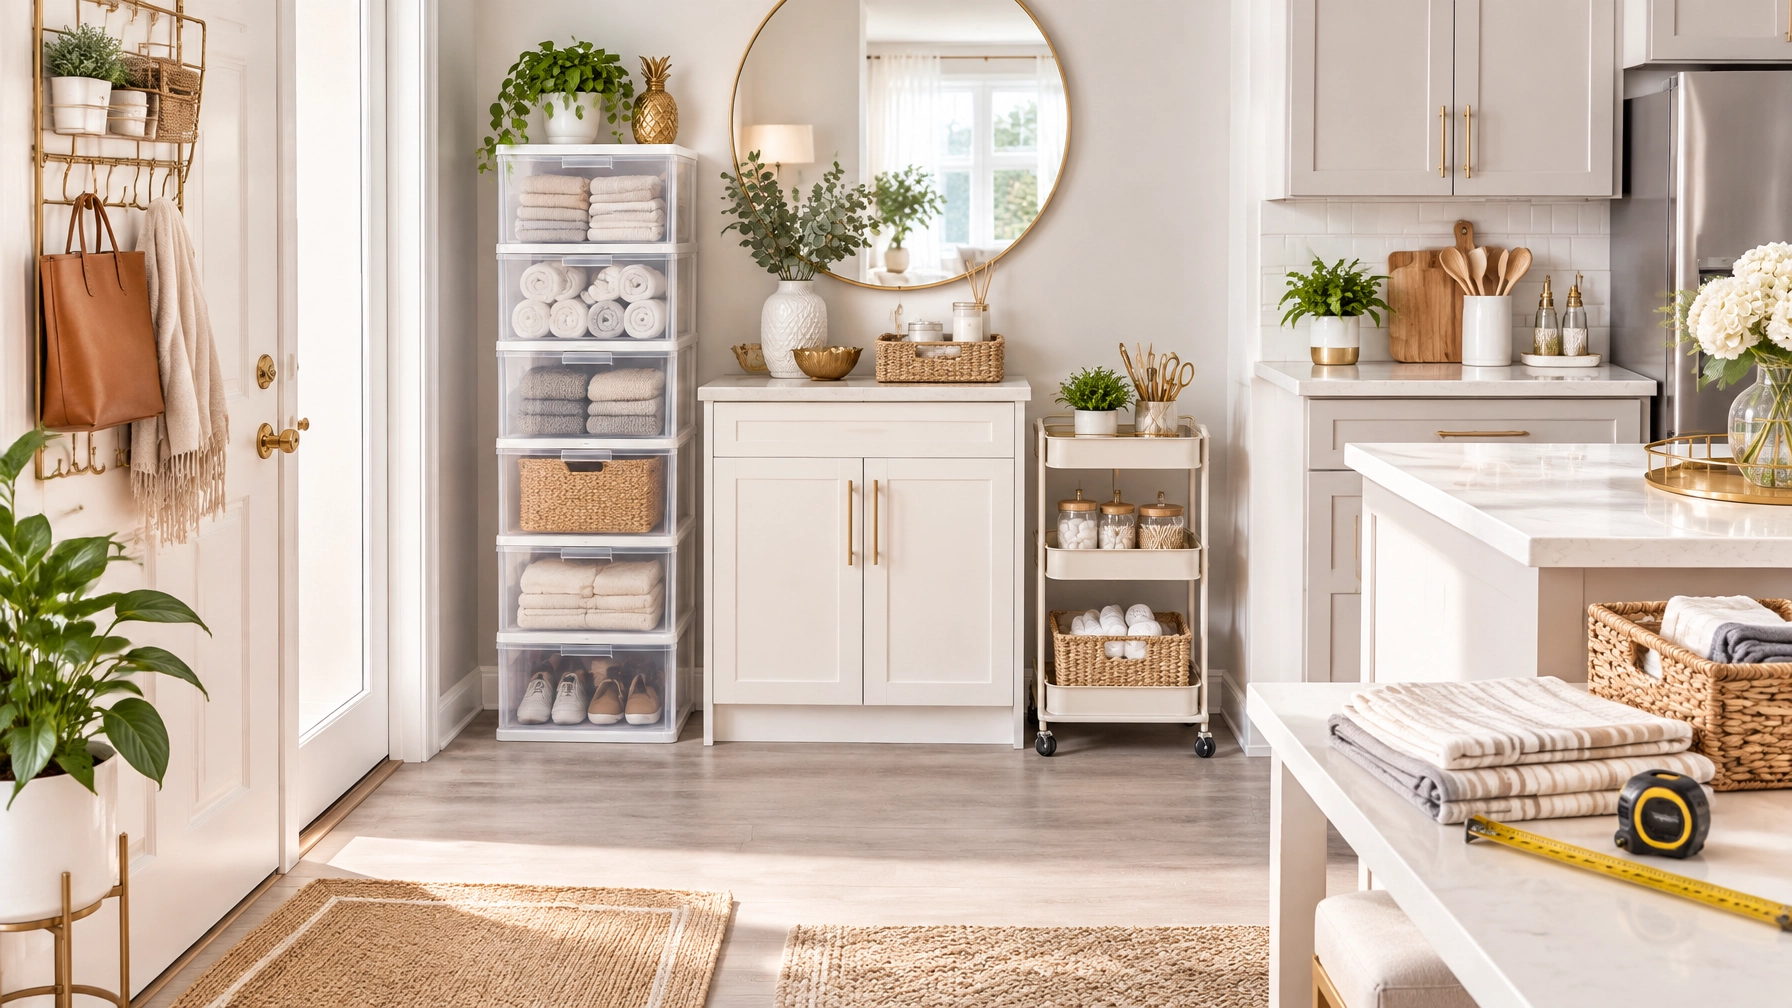
1. Build Up With Vertical Stackable Bins
The friction: Your shelf holds items in one flat layer. You stack products on top of one another, then move three things to reach one thing.
The fix: Add vertical stackable bins that create separate levels and categories.
Use them in:
- Kitchen pantries
- Bathroom cabinets
- Linen closets
- Craft storage
- Laundry areas
Measure the shelf depth first. Common pantry shelves measure approximately 10–12 inches deep, but do not assume your shelf matches that range. Choose bins at least 1 inch shallower than the usable depth so they do not overhang.
Measure shelf width and divide it by the number of bins you want. For example, three bins that are approximately 6–7 inches wide may fit a shelf that measures 18–20 inches across.
Choose clear bins for daily-use items. Use opaque bins for backstock or seasonal products. Add labels only after you confirm the category works.
2. Use the Back of Every Door
The friction: A door takes up valuable vertical space, but the surface behind it remains empty.
The fix: Install an over-the-door rack or pocket organizer.
Use one for:
- Hair products and accessories
- Cleaning supplies
- Shoes
- Small pantry items
- Craft materials
- Towels and toiletries
Measure the door thickness before buying. Many interior doors are approximately 1⅜ inches thick, but trim, molding, and hardware can affect the fit.
Measure the clearance between the open door and the nearest wall or furniture. If the space is tight, select a shallow rack approximately 2–4 inches deep. Confirm that the rack will not interfere with door handles, baseboards, or adjacent cabinets.
Check the listed weight capacity. Store lightweight items higher and heavier items lower. Avoid loading a rack with more weight than the door and hardware can safely support.
3. Turn Under-Bed Space Into a Storage Zone
The friction: The area under the bed collects dust, forgotten items, and random boxes. It is storage, but it is not usable storage.
The fix: Use lidded under-bed containers with wheels or front handles.
Store:
- Seasonal clothing
- Extra bedding
- Shoes
- Holiday décor
- Spare towels
- Bulky items you use occasionally
Measure from the floor to the lowest part of the bed frame. Choose containers that are 1–2 inches shorter than that clearance, especially if the container includes a lid or wheels.
Measure the accessible side of the bed. If the bed sits against a wall, do not plan around storage you cannot reach easily. Select containers with handles on the accessible end, and keep similar categories together.
Use compression bags for soft seasonal items when appropriate. Do not compress materials that need airflow or structure.
4. Add a Tension Rod Inside a Cabinet
The friction: Cleaning sprays, scarves, or small accessories occupy the bottom of a cabinet and waste the vertical space above them.
The fix: Add a tension rod to create a second hanging level.
Use tension rods:
- Under the kitchen sink for spray bottles
- Inside a cleaning closet
- In a wardrobe for shorter garments
- In a bathroom cabinet for small hanging baskets
Measure the interior width between the two supporting surfaces. Choose a rod whose adjustable range includes that measurement. A rod designed for 24–36 inches will not work in a 20-inch cabinet, even if the product looks similar online.
Check the rod’s weight rating. Spray bottles are convenient, but several full bottles can become heavy. Install the rod where it clears plumbing, hinges, and cabinet doors.
5. Fill Narrow Gaps With a Slim Rolling Cart
The friction: A 4–8-inch gap beside the refrigerator, washer, or vanity becomes a dust channel.
The fix: Add a slim rolling cart that turns the gap into accessible storage.
Use it for:
- Spices and dry goods
- Laundry supplies
- Bathroom backups
- Office supplies
- Pet-care items
Measure the gap at several points. Walls and appliances are not always perfectly even. Choose a cart 1–2 inches narrower than the tightest measurement.
Match the cart’s depth to the adjacent cabinet or appliance. Avoid a cart that extends into a walkway. Check height clearance under shelves or cabinets, and review the weight capacity for each shelf.
Place heavier items on the bottom. Use shallow baskets or raised edges to stop bottles from falling when the cart moves.
6. Separate Drawers With Clear Dividers
The friction: The drawer technically closes, but small items mix together. You buy duplicates because you cannot see what you already own.
The fix: Create defined compartments with clear, modular dividers.
Use them in:
- Kitchen utensil drawers
- Bathroom drawers
- Desk drawers
- Nightstand drawers
- Junk drawers
Measure the inside of the drawer, not the exterior. Record width, depth, and height. Check the drawer front and hinges to confirm that the dividers will not prevent the drawer from closing.
Choose low dividers approximately 1½–2 inches high when you want to see the contents. Assign one category to each section: hair ties, batteries, measuring spoons, charging cables, or medication supplies.
Start with a simple layout. Leave one small flexible section for items that do not yet have a permanent category.
7. Label the System You Actually Use
The friction: A storage system works for one week, then everyone returns items to the closest available surface.
The fix: Label the container, shelf, or drawer with a label maker.
Use labels that describe the item category, not the person responsible for it. Choose “Extra Toiletries” instead of a name. Choose “Baking Supplies” instead of a vague label such as “Kitchen.”
Place labels where they can be seen without removing the container. Keep categories broad enough to maintain. Ten highly specific labels create more work than five useful ones.
Review the zone after seven days. If an item repeatedly lands outside its assigned space, move the category closer to where you use it.

Room-by-Room Amazon Finds: What to Check Before Buying
Use this quick guide before adding products to your cart:
Kitchen and Pantry
- Vertical stackable bins
- Slim rolling cart
- Clear drawer dividers
- Tension rod for cleaning bottles
Check shelf depth, interior width, bin height, cart clearance, and weight capacity. Confirm that containers will fit around hinges and cabinet doors.
Bedroom and Closet
- Under-bed storage containers
- Over-the-door shoe organizer
- Tension rod for a second clothing level
Check under-bed height, container length, wheel clearance, door thickness, and the organizer’s total loaded weight.
Bathroom
- Over-the-door rack
- Clear drawer dividers
- Stackable bins
Check door clearance, shelf depth, moisture-resistant materials, and whether the organizer leaves enough room for plumbing or drawers to open.
Laundry and Utility Areas
- Slim rolling cart
- Tension rod
- Labeled bins
Check the gap width beside the washer or dryer, the cart’s height under cabinets, and the weight rating for detergent bottles.
Read current product reviews for comments about stability, assembly, wheel quality, and real measurements. Product dimensions can vary significantly between listings that appear similar.
Turn the Organization Project Into Shoppable Videos
A real storage problem creates a natural product demonstration. You do not need a staged room or a large product collection. Show the problem clearly, then demonstrate one useful solution.
Use this five-part filming framework:
- Show the problem. Film the crowded drawer, blocked shelf, or unused gap from one steady angle.
- Name the product category. Say, “This is a slim rolling cart for narrow kitchen gaps.”
- Demonstrate one feature. Show the cart sliding out, the bin stacking, or the divider adjusting.
- Show the finished zone from the same angle. Make the change easy to compare.
- Direct viewers to the storefront list. Explain where they can find the exact category or item.
Keep each video focused on one friction point. A video about an over-the-door rack should not also become a full pantry tour.
Build storefront lists around the viewer’s problem instead of the product type. Use list names such as:
- “Small Bathroom With No Cabinet Space”
- “Storage for Narrow Kitchen Gaps”
- “Under-Bed Solutions for Seasonal Items”
- “Drawer Organization for Busy Mornings”
- “Rental-Friendly Storage Without Drilling”
This approach helps shoppers recognize their own situation faster. It also gives an Amazon storefront influencer a clearer content structure than a general list called “Organization Favorites.”

Measure Your Results Over Seven Days
Treat each demonstration as a small test. Track the following for seven days:
- Video views
- Storefront clicks
- Individual product clicks
- Saves
- Click-through rate
- Conversions
- Revenue or qualifying purchase activity, where available
Calculate click-through rate consistently:
Storefront clicks ÷ views × 100 = storefront click-through rate
Compare similar content fairly. Match the format, platform, posting window, video length, and call to action as closely as possible. Compare a drawer-divider demonstration with another drawer-divider demonstration, not with an unrelated seasonal video.
Set a realistic test goal, such as a 20% lift in storefront clicks from a clearer before-and-after demonstration. Treat that as a target, not a promise. Keep the strongest opening, product explanation, and visual comparison. Improve one variable at a time.
If you use affiliate links or participate in the Amazon Influencer Program, disclose the relationship clearly and follow current Amazon and platform requirements. Review the official Amazon Influencer Program page for current program information, eligibility details, and disclosure responsibilities.
For more practical content systems and curated product strategies, visit the Kimberly Millionaire website.
Measure the space. Choose products that fit. Demonstrate the transformation. Then turn the finished solution into content shoppers can use.
Start with one drawer, shelf, door, or narrow gap today. Reclaim the space you already have, and make every product recommendation more useful while you do it.